Metal Gear Solid V: The Phantom Pain Prologue Screens

Warning this post contains Metal Gear Solid V: The Phantom Pain spoilers but only from the very start of the game. As is in the name, Prologue is the very first mission(s) of the game and explains what has been happening to Solid Snake the last decade or so. I’m going to be writing more about the game later but wanted to share some of the beautiful screenshots I took during the Prologue!

This is a work of fiction. Details of actual persons, organizations, events, etc. featured within include fictitious elements.

This is a work of fiction. Details of actual persons, organizations, events, etc. featured within include fictitious elements.

Sink, guns, mixtape

Sink, guns, David Bowie music.

Ammo, pills, David Bowie cassette tape.

Ammo, pills, David Bowie cassette tape.

The Man Who Sold the World

From the Man Who Sold the World cassette in a Sony Walkman.

Metal Gear Solid V: The Phantom Pain Tactical Espinogage Opertions title

Metal Gear Solid V: The Phantom Pain Tactical Espionage Operations title screen.

Metal Gear Solid V: The Phantom Pain Tactical Espinogage Opertions title press enter key

Metal Gear Solid V: The Phantom Pain Tactical Espionage Operations title screen press enter key.

Prolouge Awakening

Prologue Awakening

It's super blurry until you see this Doctor

A Doctor and some bad looking X-rays.

Solid Snake throught the mirror

Solid Snake through the mirror.

Two pictures of the guys who messed up Snake

Two pictures of the guys who messed up Snake.

Reaching for the gun, so close!

Reaching for the gun, so close!

Start of the game and a gun is already in your face!

Start of the game and a gun is already in your face!


Gun with depth of field.

Gun with depth of field.

Hook hand revlied, argh matey.

Hook hand reviled, argh matey.

Crawl, crawl, crawl

Crawl, crawl, crawl

Nurse helping patient, for now.

Nurse helping patient, for now.


Nurse did not help much!

Nurse did not help much!

Patients hanging out in this hall.

Patients hanging out in this hall.

Hiding around the hospital.

Hiding around the hospital.


Prone, prone, prone!

Prone, prone, prone!

Army guy with gas mask and flash light.

Army guy with gas mask and flash light.

Army guys with tanks and mysterious fire

Army guys with tanks and mysterious fire

Army guy after fire explosion.

Army guy after fire explosion.

Fire demon looking pissed!

Fire demon looking pissed!


Snake with demon girl.

Snake with demon girl.

Demon girl!

Demon girl!

More Army guys.

More Army guys.

More dead army guys!

More dead army guys!

More guns in the face.

More guns in the face.

Fire horse statue.

Fire horse statue.

Lets get out of her bro!

Lets get out of her bro!

Snake in the drivers seat.

Snake in the drivers seat.

Helicopter.

Helicopter.

Riding on a horse with fire.

Riding on a horse with fire.

Takin off on the horse.

Takin off on the horse.

Posted in Metal Gear Solid V: The Phantom Pain Tagged with: ,

GeForce Windows 10 Driver update for The Phantom Pain

NVIDIA released a new GeForce Game Ready WHQL driver Monday August 31st 2015. This driver coincides with the release of the game Metal Gear Solid V: The Phantom Pain, which NVIDIA offers for free with the purchase of a new high end graphics card.

Opening NVIDIA GeForce Experience shows you that a new driver is available and by clicking Download driver it will update directly from here or you can find version 355.82 on  NVIDIA’s website which says:

The latest GeForce Game Ready driver, release 355.82 WHQL, ensures you’ll have the best possible gaming experience for Metal Gear Solid V: The Phantom Pain and Mad Max.

It adds game improvements like SLI profiles and Application Profiles to tweak for better game play in The Phantom Pain. On my GTX 970 I did notice an increase in FPS overall, of course the game is locked to 60 frames per second (FPS) so there is already a limit to performance in that way.

NVIDIA GeForce Experince Game Ready WHQL driver version 355.82

NVIDIA GeForce Experience Game Ready WHQL driver version 355.82

The driver will download and then a new screen opens to install the driver. While mine was installing I actually saw a banner ad for Metal Gear Solid V: The Phantom Pain, which I guess is no surprise considering the NVIDIA logo shows up in game every time you load for the first time.

NVIDIA GeForce Experince install driver 355.82 Metal Gear Solid V The Phantom Pain

NVIDIA GeForce Experience install driver 355.82 Metal Gear Solid V The Phantom Pain

Once your done it will show Installation Complete.

NVIDIA GeForce Experience - Installation Complete

NVIDIA GeForce Experience – Installation Complete

AMD also updated their driver to Catalyst 15.8 Beta drivers and you find more info here. Time to play some MGS V: The Phantom Pain!

Posted in Hardware, Metal Gear Solid V: The Phantom Pain, NVIDIA, Windows 10 Tagged with: , , , , , ,

Redeem NVIDIA coupon code for MGS V: The Phantom Pain

If you bought a new NVIDIA graphics card within the last few months you received a free game, Metal Gear Solid V: The Phantom Pain, but you’ve got to redeem it. I happened to pick up a new GTX 970 a few weeks ago so I went through the process of claiming my coupon code and took screenshots along the way.

First thing you’ll want to have the email with your coupon code open and copied. I bought my NVIDIA card from Newegg so my email was titled “Newegg – Digital Product Delivery” with “Below is your coupon code. Please keep a copy for your records.” but yours might be different depending on where you bought your GPU.

Now head over to NVIDIA  Redemption Portal at https://redeem.geforce.com/ and select your region.

NVIDIA Redeem Select Region

NVIDIA Redeem Portal – Select Region

Enter your coupon code and your date of birthday. I’d guess need to make sure you are above 18+ since the game is rated M for Mature.

NVIDIA  Redeem Enter Coupon Code

NVIDIA Redeem – Enter Coupon Code and Date of Birthday

Select your games now shows up you can see mine is Metal Gear Solid V: The Phantom Pain. Agree to Terms & Conditions and click Continue.

NVIDIA  Redeem - Avaible Games Metal Gear Solid V: The Phantom Pain

NVIDIA Redeem – Avaible Games Metal Gear Solid V: The Phantom Pain

Now you’ve got to sign in through Steam by clicking the “Sign in through STEAM” button to the right. My coupon code was only redeemable through Steam, which is not a bad thing.

NVIDIA  Redeem - Connect your account to Steam

NVIDIA Redeem – Connect your accounts to Steam

You’ll be redirected to Steam’s website to sign in and it will state: “Note that NVIDIA is not affiliated with Steam or Valve”.

Sign into NVIDIA  using your Steam account

Sign into NVIDIA using your Steam account

Steam will ask you to grant permission to NVIDIA to add CD-keys your account so click Allow.

Steam  - NVIDIA is requesting permissions to access the following: Redeem and activate CD-keys on your account

Steam – NVIDIA is requesting permissions to access the following: Redeem and activate CD-keys on your account

Your back to the NVIDIA website again. It should show your Steam username now to the right and click Continue.

NVIDIA  Redeem - Connect your Accounts Steam logged in

NVIDIA Redeem – Connect your Accounts Steam logged in

Some final additional info that NVIDIA needs about yourself (aka data mining) so fill that out and click Redeem at the bottom right.

NVIDIA  Additonal information and your

NVIDIA Additional information and your

That’s it! You should get a confirmation email from NVIDIA titled: “Your game codes from NVIDIA” and “Thank you for redeeming your free game! If successful, the game will appear in your Steam library momentarily. ”

NVIDIA thank you for redeeming your free game Metal Gear Solid V The Phantom Pain

NVIDIA thank you for redeeming your free game Metal Gear Solid V The Phantom Pain


Posted in Games, Guide, Metal Gear Solid V: The Phantom Pain, NVIDIA, Steam Tagged with: , , ,

Install 64-bit Java in Windows 10 x64


Whether you are playing Minecraft, developing Android apps or using browser plugins you need Java installed. If you’ve running Windows 10 x64 then not only do you need Java but 64-bit Java. By default the owners of Java Oracle install 32-bit Java if you use the generic web installer page (https://java.com/en/download/win10.jsp) which is a real bummer if you’ve got 16 GB of RAM/memory like I do. This quick guide covers how to download and install Java 64-bit to take advantage of all the hardware in your computer.

Download Java SE Runtime Environment 8 x64

Java SE Runtime Environment 8 Downloads x64

Java SE Runtime Environment 8 Downloads x64

First, navigate to the Java SE Runtime Environment 8 Downloads page (http://www.oracle.com/technetwork/java/javase/downloads/jre8-downloads-2133155.html) or just Google “JRE 8” and use the first result from Oracle.com.  At the time of writing this I saw version:  Java SE Runtime Environment 8u60 (8u73 & 8u74 for March 7th update) and under that: “You must accept the Oracle Binary Code License Agreement for Java SE to download this software.” so click Accept License Agreement.

Now you see will see many different operating systems to choose from listed under Product / File Description. Second from the last, Windows x64 – jre-8u##-windows-x64.exe (Where the ## is the version number 60, 73, 74, etc..) is what you want to click just make sure you pick the version ending in windows-x64.exe.

Your browser will download jre-8u##-windows-x64.exe and you can run and install like normal. After the install is complete you’ll be able to go to the Start menu and type Java and you will see Java Configure & About Java as Desktop Apps, just to confirm it’s installed.

Java installer Windows 10 64-bit

Java installer Windows 10 64-bit

Now that you’ve got 64-bit Java installed it’s time to play some Minecraft with as many mods as you want. Seriously, I’ve been able to run over 200 mods in Minecraft using x64 Java!

Windows 10 Start menu Java seach

Windows 10 Start menu Java seach

Why not 32-bit?

The short answers is that if you have more than 4 GB of Memory (RAM) you need to be using 64-bit binaries/software to take advantage of it. There are other things to take into consideration and if you really want to dig into this subject more I suggest this post from HowToDoInJava titled Difference between 32-bit java vs. 64-bit java here is a quick bit from there:

Strictly speaking, on a 32-bit CPU architecture machine, you should install 32-bit java/JRE. On the other hand, on a 64-bit CPU architecture machine, you are free to choose between 32-bit java/JRE and 64-bit java/JRE.

While 32 bits of information can only access 4 GB of RAM, a 64-bit machine can access 17.2 BILLION GB of system memory

Update March 7th 2016 – It appears the direct link has not changed over time so I’m going to prominently display it now instead of advising of searching Google. The version was updated to 8u73 & 8u74 at the time of this update. Also updated the Java version numbers and replaced the file name with generic ## signs.


Posted in Guide, Windows 10 Tagged with: , , , ,

Chrome does not work well with Windows 10

Slow launching, constant lockups and issues with forms seem to plague Google’s Chrome under Windows 10. After the initially install Chrome took a few minutes just to open up and that was the start of a horrible bug ridden journey. Funny enough I wrote a post detailing a bug in Chrome downloading the Windows 10 ISO last week but that is nothing compared to these bugs with Windows 10. Honestly, I would just stop using Chrome for the time being because it’s beyond frustrating when simple tasks like switching tabs or entering information into a form cause a lockup.

Chrome up to date Windows 10

Chrome up to date in Windows 10

I’ve been using Windows 10 for over a week now and for the most part it works great along with all the software I use. Enter Google Chrome, which besides an issue here and there worked fine on Windows 8/8.1 and Mac OSX. Chrome under Windows 10 is utterly unreliable and unbearable for even the simplest of tasks.

First, the initial load took forever. After the install I opened Chrome and it took 3-5 minutes just for any sign of Chrome to show up. Task Manager showed Chrome was running and consuming resources but no GUI for awhile. I chalked that up to being the first launch and maybe it had some initial setup that takes longer on Windows 10. Now I know that’s not the case because I had it happen to me again. Chrome does start fine now after a week of running it but it’s still a bad sign.

Second, it’s constantly freezing and locking up for no apparent reason. This is using Google’s own services like Gmail, Calendar, Search will freeze going between them. Even just using the settings trying to click: History, Extensions, About to navigate options it freezes up! I’m not trying to run intensive WebGL or anything just simple JavaScript and HTML.

Lastly, interacting with HTML forms like search boxes, selects, textareas also cause a lock up. I use WordPress daily and the admin section has tons of form elements for posts and pages. Chrome under Windows 10 makes WordPress unusable and I say that without hyperbole because I’m actually typing this post in Firefox after getting fed up with Chrome’s lockups.

At this point I should note Firefox works great, hell even Internet Explorer and Edge work well enough compared to the multitude of Chrome issues. Being a developer I’ve always had many browsers installed and open at once to check websites. It’s not an issue for myself to exclusively use Firefox at this point but average consumers who have always used Chrome might feel a bit uncomfortable switching all the sudden due to bugs.

Google Produt Forum Chrome Issue

Google Produt Forum Chrome Issue

On Google Product Forums I found a post with similar issues: Google Chrome is not working on Windows 10. ( Connection Timeout). Many users recommend uninstalling Chrome and switching to Chrome Canary, Google’s Chrome but with new developer features. While I have not tried Canary, users do report it working better than normal Chrome. Of course Google says Canary is not stable and is designed for developers who want to test new features that have not made it to Chrome yet so approach with caution!

At the time of writing this my Chrome was up to date at: Version 44.0.2403.157 m

Chrome Version Info in Windows 10

Chrome Version Info in Windows 10


Posted in Issues, Windows 10 Tagged with: , ,

Troubleshooting and fixing Battle.net issues with Windows 10

Battle.net Launcher with StarCraft II ready to launch

Battle.net Launcher with StarCraft II ready to launch

If you’re having trouble installing the Battle.net App and Blizzard games then this guide will help you fix them! I kept running into “BLZBNTBTS0000005D” errors when setting up my new Windows 10 computer. I briefly talk about this issue in my last post. Luckily, I was able to get the Battle.net App & StarCraft II installed after a bit of searching and troubleshooting and this guide will detail those steps.

First, even though the Battle.net App or Blizzard game gave you an error about not being able to connect, it may have actually worked. For me at least, it actually did install the correct files to launch the Battle.net App. Navigate to the directory you picked to install the Battle.net App. The default is C:\Program Files (x86)\Battle.net. You should find some executables (EXE) and folders.

Files of importance are “Battle.net Launcher.exe” & “Battle.net.exe” executables . Hopefully you see these files because this guide is dependent on having them. If you do not, then keep trying to install Battle.net the regular way. Also, you may not have file extensions visible. So you may just see “Battle.net Launcher” & “Battle.net” without the .exe at the ends.


Try to run the “Battle.net Launcher.exe” file. but I kept getting the same error. The program was not able to connect (“updating Battle.net” , then “starting Battle.net” for a second, then error). Luckily, many experienced this same issue with Windows 8/8.1 64-bit and so I found a forum post on Blizzard’s website. The post title Cannot install Battle.net app properly. Error: BLZBNTBTS0000005D that was the most helpful. Sadly, Blizzard has change their forums so the direct link does not work anymore.

Fixing Battle.net Issues BLZBNTBTS0000005D

Battle.net Launcher Compatibility mode

Battle.net Launcher Compatibility mode

The fix that worked for me was right clicking Battle.net Launcher.exe then click Properties > Compatibility tab >  check the box “Run this program in compatibility mode” > from the drop down select Windows XP (Service Pack 3) >  also check “Run this program as an administrator” > click Apply > OK.  Apply the same settings for Battle.net.exe and you should be good to go! Running Battle.net Launcher.exe should allow you to download any Blizzard game like StarCraft, Diablo, or World of Warcraft like normal.

Officially, Blizzard recommends running Windows in Selective Startup and disabling virus scanning software. Support Forum Agent Glaxigrav states this in a Blizzard forum post:

Can you please try running a Selective Startup first, and then install the Battle.net App? If you have any security software installed, you’ll want to be sure to temporarily disable that as well.

Once you’ve done that, you can grab the most recent version of the Battle.net App here. Let me know if that gets the installer going!

But that solution did not work for many nor myself, as pointed at by the forum post. Once StarCraft II finished downloading and installing I did run into more problems. Actually launching the game where the launcher said it was located did nothing. That was fixed just by restarting my computer. Now my Battle.net App and StarCraft II run without issues and I hopefully yours do as well!

When I first wrote this article back in 2015 I had linked to the Blizzard forum post. Sadly, Blizzard has changed it’s forum so the link no longer works and I removed it. But I did find a new official support article.

Posted in Games, Guide, StarCraft II, Windows 10 Tagged with: , , , , , , ,

Battle.net App issues with Windows 10: BLZBNTBTS0000005D

Battle.net App Install stuck at 89%

Battle.net App Install stuck at 89%

Installing the Battle.net App can have it’s issues. The launcher for Blizzard games gave me trouble on Windows 10. These bugs seem to involve the new operating system and Windows 8/8.1 64-bit users. I wrote these guides to help troubleshoot and hopefully fix the issues.

The installation started normally for me. It opens and asks you to select a folder for the files. Then my progress bar did not want to budge. “Installing Battle.net…” was the only message along with the percentage complete. Finally, when it did move it became stuck at 88% or 89%.

Waiting for 10+ minutes and it had not moved from 89% so I tried canceling and running as administrator. Eventually, I did get an error message: “We’re having trouble starting Battle.net. Please try again. If the problem persists, try restarting your computer.” along with “More help: BLZBNTBTS0000005D”.

Troubleshooting and fixing Battle.net in Windows 10

If you’re looking for the fix to this issue please check out my post: Troubleshooting and fixing Battle.net issues with Windows 10 where I get Battle.net App and StarCraft II installed after a bit of troubleshooting.

Battle.net App error BLZBNTBTS0000005D

Battle.net App error BLZBNTBTS0000005D

My screenshots show StarCraft II Wings of Liberty images. I was attempting to install StarCraft II through the website using StarCraft-II-Setup-enUS.exe. But, all that really does it download the Battle.net App with StarCraft images. Trying the official Battle.net App client (Battle.net-Setup-enUS.exe) had the same issues.

In the past you would download each game separately but Blizzard created the Battle.net App to handle this process. It’s disheartening Blizzard did not optimize for Windows 10 and from my research it sounds like Windows 8/8.1 also had issues with Battle.net App so Windows 10 Battle.net issues we’re to be expected I suppose.

The good news is that I was able to get the Battle.net App & StarCraft installed after a bit of troubleshooting. I’ll detail exactly how I did that in my next post!

Posted in Games, Issues, StarCraft II, Windows 10 Tagged with: , , , , , ,

Chrome issue downloading Windows 10 ISO from Microsoft

This download was taking too long and was stopped by the network.

This download was taking too long and was stopped by the network.

While trying to download the disk image (ISO) for Windows 10 from the official Microsoft servers (http://software-download.microsoft.com/) I kept getting an error in Chrome: “This download was taking too long and was stopped by the network.” The image should be around 4 gigabytes but Chrome would only download around 2.15 GB before erroring  out and resuming was not an option!

Windows 10 download page from Microsoft

Windows 10 download page from Microsoft

Honestly, I assumed Microsoft’s servers might be on the fritz because I had not been experiencing any issues with my internet or Chrome and I had never seen that particular error message before. I tried to download it again but with the same results. Time to try another browser and I happen to have Safari open because I was on my MacBook Pro. It downloaded without issue in Safari and I resumed my Windows installing adventure onto my computer.

It turns out this was not just a Microsoft thing but Chrome has issues downloading files larger than 2 GB apparently! The most active issue concerning the topic hosted on Chromium’s code.google.com page I found was: “Issue 89567: HTTP Download stops at 2GB when saving the file on another NTFS drive.” This thread was started in 2011 and had a comment as recent as Aug 11, 2015 from the time I wrote this.

Interesting bits in the thread included:

I’m on Ubuntu 11.04. It goes to 2GB and stops with the Windows 8 CP ISO. I’ve tried it at least 10 times, and if it starts at all, it will only go to 2Gb and claim to be done. The file is 2.52GB. It wont download on my Vista machine at all using IE9. I’m using Chrome on Ubuntu, and have tried Firefox and Chromium, which don’t work at all.
#7 desighne…@gmail.com

I also encountered this problem while trying to download a file > 2GB from Amazon cloudfront servers. I open a new tab, paste the link in the address bar, and hit Enter.
Twice the download has been incomplete, different sizes each time. One time was 1916208128 bytes (already deleted the other file). Full file is 2123802785 bytes. One time Chrome did get the whole file — strange to be so inconsistent.
#57 percy.bl…@gmail.com

Even though I was on OS X and not using NTFS as the format of my storage it sounds like others have been having the issue. Throughout the issue thread various Chromium.org  members chime in asking for logs and links to files that have this download issue to test but there is also a strange impression this issue will not be fixed. The thread was almost shut down being marked “Closing old bug as obsolete” without providing a fix. Ending sentiments from the thread:

Well, given how long the problem has been outstanding, and given that the precise limit of truncation shows that this can’t be dismissed as a rare or random glitch, it is perfectly clear that they neither care nor can be bothered to do anything about it.
#99 T.A.H…@gmail.com

I should also point out that Google Code is being shut down as noted by the red letters atop the screen: “Google Code will be turning read-only on August 25th. See this post for more information.” Eventually, everything will be taken down on Google Code, so who knows if this bug will ever get fixed.

Chromium's issue thread on Google Code

Chromium’s issue thread on Google Code


Posted in Issues, Windows 10 Tagged with: , , , ,

Rooting, Installing BusyBox and Disabling OTA updates on the Fire TV

This guide covers rooting (or rerooting in my case) using towelroot to gain super user and install BusyBox. Lastly, we’re going to disable the auto updates once again so Amazon can’t push a software update to the Fire TV. Because I downgraded my stock software I ended up loosing the root I previously had. Good thing for me all the files I used to originally root are still on my Fire TV!

The first guide from AFTVnews to follow was: How to Root the Amazon Fire TV. I recommend following this link to read even more details about the root process. The main prerequisite for rooting is having a good version number of the stock Fire OS that is low enough to allow rooting. Because Amazon started shipping newer versions of the Fire OS that prevented this method of rooting chances are are if you’ve got a newer Fire TV it cannot be rooted at this time and this guide will not help you at all. Check out AFTVnews’s Fire TV & Fire TV Stick Rooting Starters Guide for more information if you’re uncertain about your Fire TV’s eligibility.

This is the third part of Andrew’s guide to updating his Fire TV from the year old stock software with root to a custom ROM with root.

1. Download towelroot (tr.apk) by clicking the red icon at towelroot.com
2. Download SuperSU apk from evozi.com
2a. Download BusyBox using the evozi APK Downloader.

First download the three Android application packages (APK). These are essentially Android apps created specifically to give root to the Fire TV and give Super User (SU) to apps that require it as well as ADT when we request root in the shell. The first link to towelroot is a direct download but the others through evozi requires you to click “Generate Download Link” before you are able to download. This is because evozi is pulling actual app data from Google’s Play Store so you’re basically requesting to download the specific apps SuperSU and BusyBox .

3. Sideload all three APKs onto your Fire TV using any of the methods we’ve written about in the past.

System > Applications  >  towelroot

System > Applications > towelroot

Install all three apps to your Fire TV but you will need to use them in a specific order.

4. Launch towelroot from your Fire TV application menu.

5. Press the select button on your remote to click the “make it ra1n” button in the towelroot app and wait for it to complete, no reboot required.

towelroot “make it ra1n”

towelroot “make it ra1n”

Navigate to “towelroot” in System > Applications and launch the application. A simple app with “welcome to towelroot v3” at the top should open. You’re going to want to click the single button on the screen “make it ra1n”.

If it worked you should now see: “Thank you for using towelroot! You should have root, no reboot required.”

"Thank you for using towelroot! You should have root, no reboot required."

“Thank you for using towelroot! You should have root, no reboot required.”

SuperSU update binary and success

SuperSU update binary and success

6. Launch “SuperSU” from System > Applications.
7. Update the SU binary if asked by selecting “Continue”. Select the “Normal” update method when asked.

Now super user should be installed and you’ll be able to allow apps and ADB root access.

8. Verify you have root access. This step is optional because if you don’t have have root access you won’t be able to install BusyBody in the next steps.
9. Launch “BusyBox” from System > Applications.
10. Click “Grant” in the Superuser request screen that should have popped up. This gives BusyBox root access.
11. “Welcome to BusyBox!” message pops up. Either hit the back button on your remote or if you’ve got a mouse click the red X in the top right.

BusyBox Welcome Message

BusyBox Welcome Message

Disabling OTA updates with root through ADB shell

The second guide from AFTVnews to follow was: How to block OTA update for Amazon Fire TV and keep Root Access. I recommend following this link to read even more details about disabling updates.

ADB shell pm disable com.amazon.dcp

ADB shell pm disable com.amazon.dcp

12. Open a command line type: adb shell and hit enter
13. Then type: su and hit enter
14. Then type: pm disable com.amazon.dcp and hit enter
15. You should see the message: “Package com.amazon.dcp new state: disabled”
(If you instead see the word “Killed”, it means you have not gained super user (su) and need to go back and repeat step 3.)
16. Then type: exit and hit enter
17. type: exit and hit enter again

Establish a shell connection with the Fire TV and then copy paste each or type each command.

That’s it, now you’ve got root and it will not get wiped out by updates.

Posted in Android, Fire TV, Guide Tagged with: , ,

Manually Downgrading the Stock Software on Fire TV

The second part of Andrew’s guide for updating his Fire TV from the year old stock software with root to a custom ROM with root.

With a larger goal of being able to update to a new custom ROM with root I began down the rabbit hole of AFTVnews tutorials to figure out my first steps. In the world of custom ROMs and rooting it’s not uncommon to switch between different versions of software that might offer different features or enable certain levels of tweaking not possible in later versions. To upgrade my Fire TV software I first had to downgrade to a version that could run the aftv-full-unlock and unlock the bootloader.

The easiest way to accomplish this is by having a good recovery mode and one of the best is the ClockworkMod Custom Recovery. To install ClockworkMod though I first need to unlock the bootloader of the Fire TV which is not too difficult but does require a specific tool called aftv-full-unlock. Aftv-full-unlock requires very specific versions numbers of the Fire OS to work correctly and sitting at 51.1.1.0_user_511070220 was too high and thus began the journey to downgrade my version to 51.1.0.2_user_510058520. Since I currently do not have ClockworkMod working installing a custom ROM will take a bit more work than usual but it’s worth it in the long run to be able to unlock the bootloader and eventually having ClockworkMod.

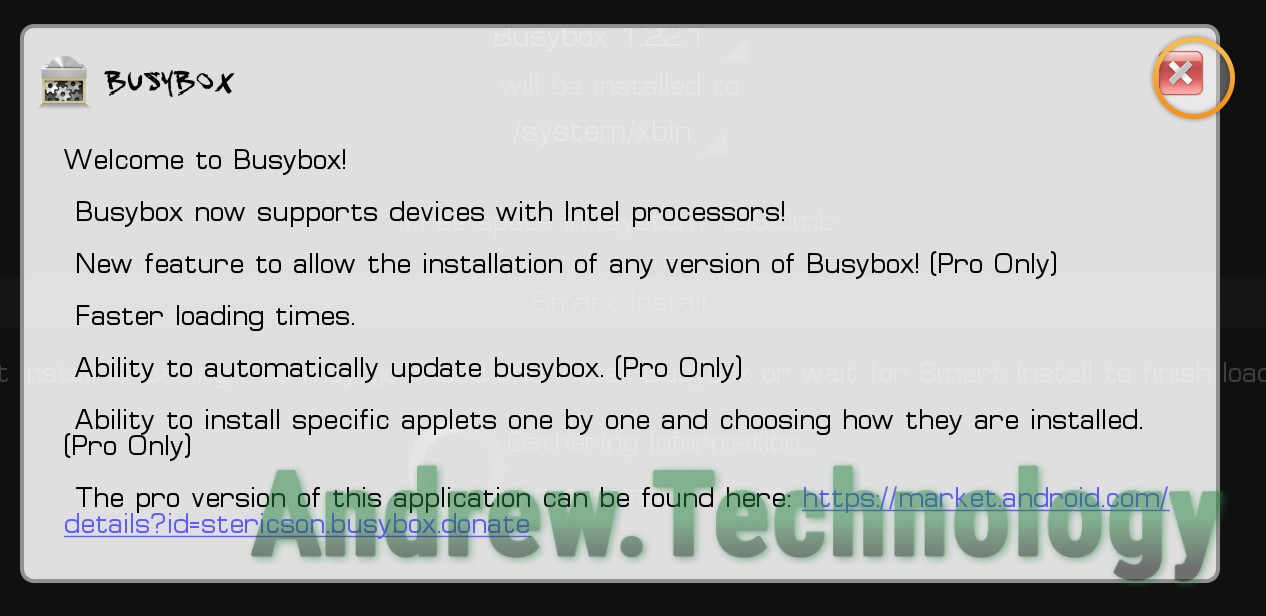
The guide for this step from AFTVnews was: How to manually upgrade or downgrade the Amazon Fire TV.  I recommend following this link to read even more details about the requirements of upgrading or downgrading. The main prerequisite for this guide is having root and BusyBox installed. I’ll detail how to install those in a later guide but for now my Fire TV already meets that criteria so I am ready to go!

Manually downgrading from 51.1.1.0_user_511070220 stock to 51.1.0.2_user_510058520 stock

1. Download the firmware version you wish to install from the software page

Navigate to the software page on AFTVnews and search for “51.1.0.2_user_510058520” click the Download or Mirror link to download “bueller-ota-51.1.0.2_user_510058520-signed.bin”. This page has all the Fire TV Stock Software by Amazon, which I refer to simply as “stock” most the time.

2.Rename the downloaded file to update.zip

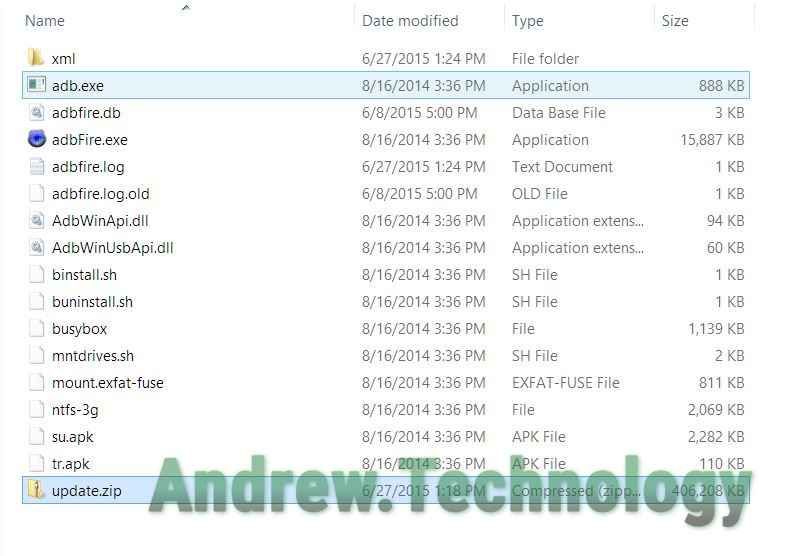
Rename “bueller-ota-51.1.0.2_user_510058520-signed.bin” to “update.zip”

3. Connect to your Fire TV using ADB

Make sure you’ve got ADB Debugging/USB Debugging enabled under System > Developer Options. See Amazon’s Connecting ADB if you need more help with it.

ADB and update.zip

ADB and update.zip

4. Run the command: adb shell

This is the first command to establish a shell connection with the Fire TV. If you don’t have ADB path’s installed system wide you will need to navigate to the folder containing your Android Debugging Tools (ADB) aka “adb.exe” on Windows to run this command. Also copy update.zip into the ADB folder.


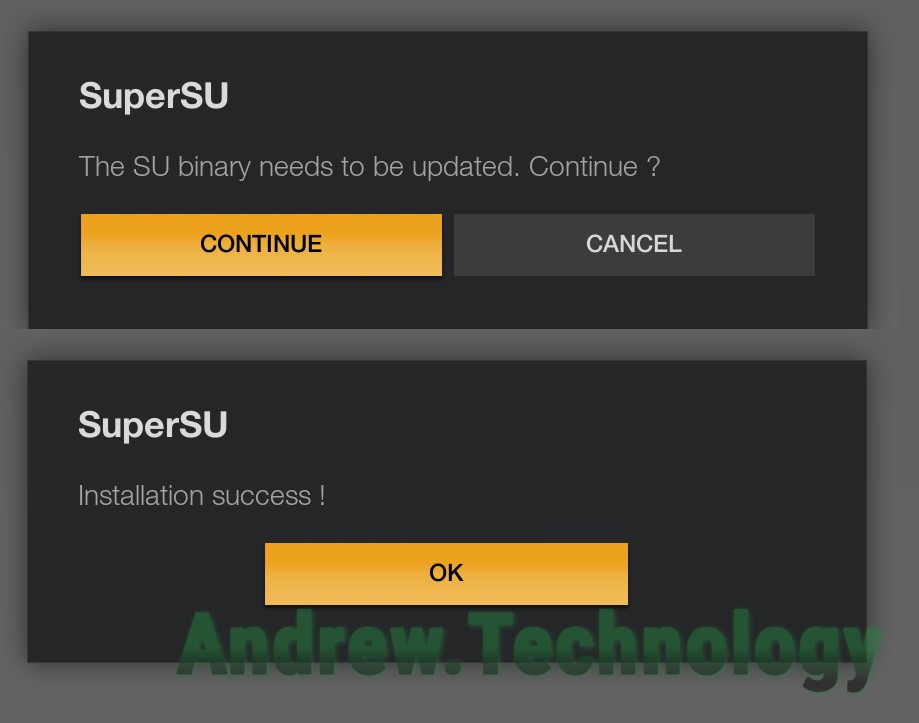
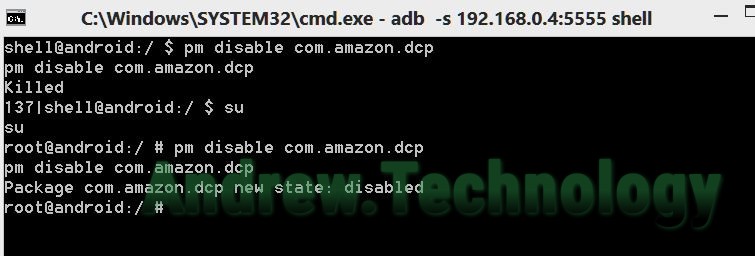
5. Run the command: su (If this is the first time you’ve ever run su, a pop-up will appear on the Fire TV, select Grant)
6. Run the command: chmod 777 /cache
7. Run the command: chmod 777 /cache/recovery
Note: If you see a message saying “No such file or directory”, then run the following two commands:
mkdir /cache/recovery
chmod 777 /cache/recovery
8. Run the command: cd /cache/recovery
9. Run the command: echo –-update_package=/cache/update.zip > command
10. Run the command: exit
11. Run the command (yes, again): exit
12. Run the command: adb push update.zip /cache
(This assumes the update.zip file you renamed in step 2 is in the same directory as adb, otherwise enter the full path to the file like adb push C:\full\path\to\update.zip /cache)

Copy paste each or type each command and hit enter. These commands basically change the permissions of the cache and recovery folders so we can update them with our new Fire TV Stock version 51.1.0.2_user_510058520 update.zip and then we push the update.zip to folder and reboot.
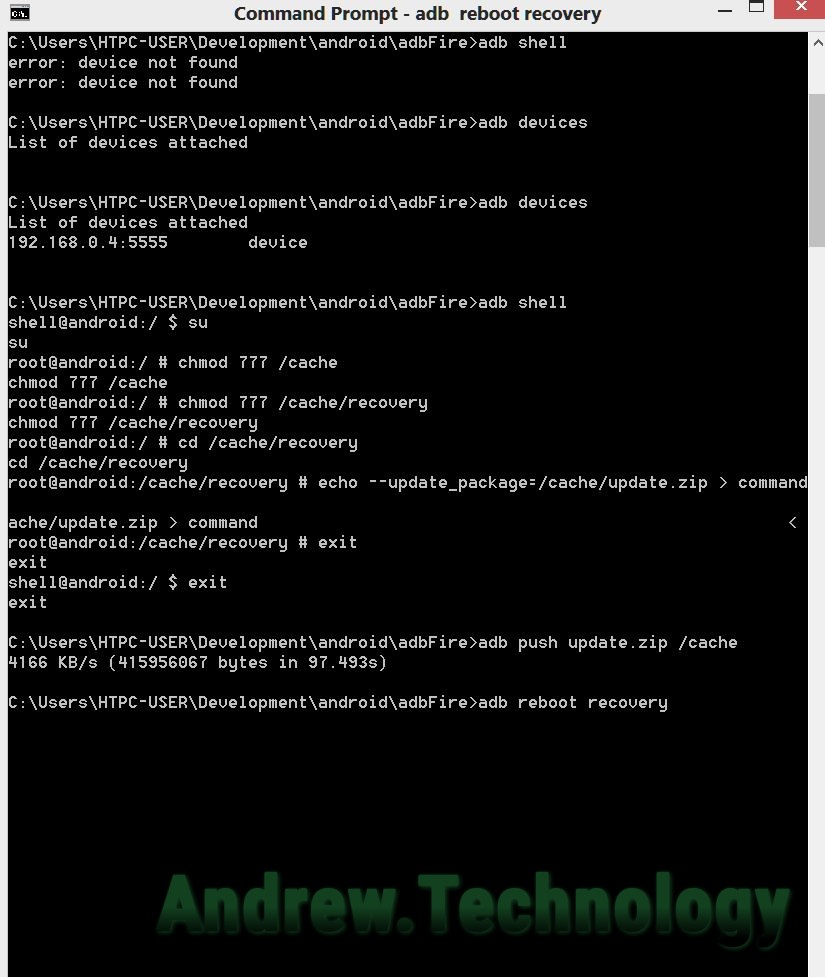
ADB commands

ADB commands

13. Once the update.zip file has finished transferring to the Fire TV, run the command: adb reboot recovery

This last command will restart you Fire TV and implement all the commands issued. Since we pushed our update.zip to the cache folder after the reboot the OS will perceive this an update from Amazon and install it. You’ll see the white Amazon logo but then a screen stating “Installing the latest software” with a white progress bar.

After it finishes that, it will restart again. You’ll see the white Amazon logo but this time followed by the normal colored Amazon logo. “Installing the latest software” screen comes up again but this time with many many quick progress bars, more than 10 for sure, it looks kinda strange but just let it run and do its thing. Do not disconnect power at all during the install!

After installation is complete the home screen should load up like normal. Check out Settings > System > About to make sure your system version reads “51.1.0.2_user_510058520” and you know the downgrade was a success.

Read the next part of the guide: “Rooting, Installing BusyBox and Disabling OTA updates on the Fire TV”

Posted in Android, Fire TV, Guide Tagged with: , , ,